Showing posts with label Tutorials. Show all posts
Why to Root your android

Hey there android users!wassup?are you in a dilemma of whether or not to root your android device? well,then this post is for you.i'm gonna briefly point out the advantages and dis advantages of rooting your android and then you yourself can weigh them and take a decision.
Advantages of Rooting Android phone:
Install incompatible Apps:


Your device may be the latest one with high specs,but still there are certain apps which you are not allowed to install on your devices.They maybe blocked by the carrier,or may need additional privileges to run or some times your phone may not be of the compatible brands,whatever the reason maybe,rooting helps you out
Automation:


There are some apps that can help you automate your everyday tasks,like enable/disable silent mode after particular time of the day,play songs when earphones are plugged in,silent on flip action( if not supported by default ),toggle wifi and mobile data basing on location or time and many more,you name it!you can get the full task automation capabilities over your droid once you root it
Boost phones speed and also battery life:

Battery life is one of the main things that bother us,and most of us do know how to optimize battery life.same is the issue with speed,but once you've rooted your phone you get the complete hands on to these features,you can overclock your processor and there are even some custom ROMs which consume lesser amounts of battery than your stock ROM
Block Ads:


Yes you can block Ads,pop ups in any app after you've rooted your device
Complete Backup:
Google may provide a backup of your primary data like contacts,mail,messages,wifi credentials etc but there are certain apps out there which can create a complete backup of your app/system data,which means once you've taken a backup of a game,and after you accidentally uninstalled it and then restored the backup,you would get all the old game coins,levels,missions etc right where you left them without having to play from the beginning
Remove pre-installed Apps( blotware ):

Most of the phones with stock ROMs come with many unwanted pre installed apps like flipkart,m buddy etc etc which are there even if we never use them,they are by default un-uninstallable,but rooting helps you get rid of them
Tweak every possible display element:

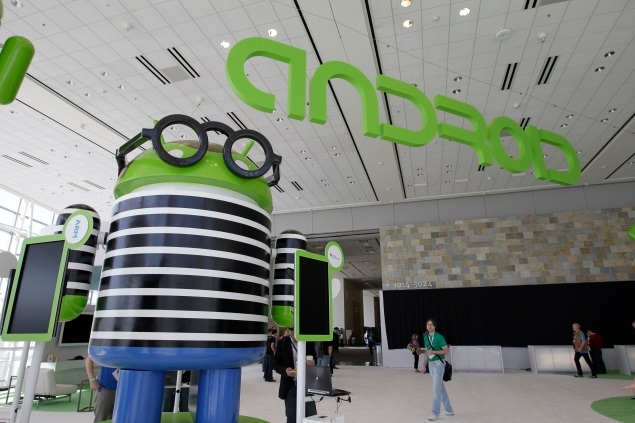
There are certain apps that allow you to customize every corner of your android without installing much of third party running services which hog your memory.you can customize your boot logo,system fonts,task bar,notifications,keyboards,list scroll effects,change the complete look and feel of your device
Functionality:

Here comes the main feature for power users,rooted devices provide a diverse and highly functional environment than the general android,you may be surprised to know that you can even run windows xp or kali linux on your android device,yes it is very possible.and there are tons of apps in the play store itself to add greater functionality to your rooted device
Social Networking made easy:

Apps like 2 lines for whatsapp or 2 lines for facebook lets you run multiple whatsapp or facebook accounts with the same device and you can switch between accounts within seconds
Flash Custom ROMs~one for every one!:

You don't have to stick to your stock ROM provided by the manufacturer,there are tons of custom ROMs out there available for free and which are highly tweaked and personalized by experts you can taste them all once you've rooted your device
Upgrade to latest version of android even before manufacturer releases OTA Update:
you no longer have to weight for the manufacturer to release an upgrade patch for you to get the latest android version,you simply can search for required ROM and flash it by yourself
PEN Test:

you can use your android device to hack into wifi,try dictionary attacks,perform MITM,cookie stealing,session jackings,network deAuths,ARP poisoning and all many more advanced PEN tests
The above are just some of the things you can do with your rooted android device,and when it come to the disadvantages of rooting,
- Voids warranty
- possibility of bricking (very very less probable)
- Minor issues with Google Wallet
Thats all,now its upto you to decide
Control VLC player with android

you may sometimes choose to relax,connect your pc to your tv via hdmi and watch some movie,but the thing is you need to get back to your pc every time you want to change the media or to tweak the volume,one comfortable way is to use your android device within the same network to control vlc media player,lets see how we can do it
- First download vlc remote setup helper
- Install it and run it

Now hit Setup vlc.then download VLC Remote Free,scan for your computer and you are all ready to go!and remember you need to run vlc setup helper every time you want to control vlc through android
Installing USBasp Drivers in windows

- First download USBasp drivers and extract them
- Plug in your USBasp programmer,wait till windows tries to install it,in most of the cases,it may fail to
- Before proceeding any further,you would need to disable driver signature verification on windows,just go through that post
- once you are done, open system properties and on the right corner select device manager


- You would see not installed devices under "other devices",USBasp is ours.right click it and select "update drivers"

- Select browse my computer for driver software

- just browse to the extracted folder,remember just the "folder" not into it, and click next

- there you go now your USBasp drivers will be successfully installed :)


For best buy,try Playwithrobots store
Disable Driver Signature Verification on windows
I would be using my windows 8.1 system for demonstration,so first of all mve your mouse to the bottom right corner to open the charm bar,


 I
I


- Choose settings
- Change pc settings,
- Goto update and recovery tab
- open recovery tab
- And in the advanced startup,click the restart now button
I- wait for the system to shutdown and restart again,goto advanced options,then a menu similar to the below image shows up
- Choose start up settings and then hit restart
- And then you will be given a gui with various options like boot in safe mode,eneble low resolution video mode etc etc
- Check if "Disable driver signature Enforcement" is the 7th option in the list,if so hit F7 or the respective function key,then the system proceeds with usual start up,and you've successfully disabled driver signature verification
Hyper -V

In our previous post about Running Multiple Operating Systems Virtually we've seen how we can manage and create new virtual machines,now lets try doing the same with some built in tools of windows 8.Actually Hyper-V is a much broader concept,it allows us to run virtual servers and cloud platforms,but lets just stick to running a private virtual machine for another operating system.
And its alot of strain than simply using a virtual box but no harm in learning isn't it?
Ok before we step further into it first lets see the basic requirements for running Windows Hyper -V
- A X64 based processor or simply a 64 bit system
- Hardware assisted Virtualization ( a processor supporting Virtualization )
- Hardware-enforced Data Execution Prevention
Never mind if you don't know these specifications about your pc,you can find them out simply just search for "system information" and the you would be presented with almost every possible data about your computer,now if you can scroll down a bit you would find the hyper V support details


( sorry for the bad image quality )


If the third option ,Hyper-V virtualization Enabled is set no for your system don't worry it says your system is capable of supporting virtualization but it has been disabled you can enable it by tweaking the bios menu if you don't know how to,google it for your hardware coz it varies from manufacturer to manufacturer.
Now that we know whether our pc is capable of supporting Hyper-V,lets go to the next step.
You need to enable Hyper-V.Goto control panel => Uninstall Programs =>Turn windows Features on or off


Check Hyper-V and click ok and wait for the feature to be added.After a restart you would find two icons related to Hyper-V

- Now click open Hyper-V Manager.on the right side column you would find a new option select it and click New virtual machine


- Give your virtual disk a Name and if you want to you can select the location where the disk files are stored

- Allocate the amount of RAM within the bounds suggested and also check use Dynamic Memory


- Opt Install an operating System from a boot cd and then browse for your iso file

and now you have created your virtual machine successfully,lets try it out

- Click Start

- After the machine have started,click Connect


Running Multiple Operating Systems simultaneously

Bored of your same old windows Operating System?wanna try something new?or need to use linux for your development project or something?if the answer is yes,then don't risk formatting your hard drive or dedicating an entire drive for dual or multiple boot for something which you would use only once in a while.
Today lets see how to achieve our above mentioned goal through a simple concept of virtualization.in short its nothing but creating a virtual environment for another operating system to run on your current operating system

As you can see my current OS is windows 8 pro which is referred to as the Host OS and i'm running two guest OSystems ie., windows 7 and windows Xp and that too i can work with all of them at the same time.lets not go too deep ino how it works but lets see how you can do it
- First of all you would need a virtualization software like Oracle Virtual box or vmware player
- i would be using oracle virtual box for this demonstration and we will be installing kolibri OS ( perhaps the smallest of all )
- After installing virtual box,open it now click the " new " button to create a new virtual machine

- Next


- Now type in a name for your os,and probably vbox would automatically detect the os by its name if its accurate enough or you can select the Operating system and flavor manually if you donno about the os much you can simply select "other " in both os and version

- Select the base RAM size i suggest do not exceed more than half of your original ram size because you have to be running both the Host and the guest OS and always prefer allocating the Recommended base memory size..


- You can select either VDI or VMDK but the advantage with VDI is its trad able ,ie you create a virtual machine and you can give that VDI file to your friend so that he can use it directly


- You have to allocate the hard disk space for your OS don't give it too much just choose how much you need and make sure it meets the minimum hard disk space requirements of the OS and by clicking that folder icon you can change the location where your hard disk is stored i suggest change it to some other drive than your root drive


- Now select your newly created os,click settings ->network tab and change the network adapter to Bridged Connection

- Now start your os and then the first run wizard will pop up asking you to select the boot file which is supposed to be an iso file of your OS


- Thats it you can run almost every possible OS you can find.some visuals may vary in newer versions of virtual box but the basic steps remain the same.
- You can create as many virtual machines as you like

- Here is a small list of Operating Systems you can try out:
- Download Kali Linux
- Download Backtrack 5 R3
- Download Kolibri (just 4 mb )
- Download Elementary Os
- Download Puppy Linux ( yup datz cute )
- Download Damn Small Linux
- Download Helen Os
- Download windows 8 pro
- Download Game Over
- Download Slitaz
- Download Ubuntu Desktop
- Download Chrome OS
- Download Mac OS X 10.5.6
- A small Manual on installing Kali Linux and windows xp

